November 03, 2021
English | 日本語
Setup GUI for Debian Bullseye (English)
Memo how to set up GUI for Debian Bullseye.
btw, they said that we should not log in as a root, because it may destroy the OS by mistake. We can acquire the root privilege using the command 'sudo' when necessary.
For example, an infinite loop to append to a file. Usually, the user cannot use the disk fully, so it causes an error and stops before running out of disk space.
In the case of root user, however, such a loop will consume all. Then, the OS may stop working, and possibly it might not boot after that.
I know that, however, I make it a rule to log in as a root at the first setting. (settings for network, hostname, and sudo command.)
Why?
First, I may not acquire the root privilege after some mistake. It is impossible to recover after that unless we log in as a root.
Next, I could reinstall the OS if I would ruin the OS. We should not be afraid of trouble too much before starting to use it. (That's why I don't use the command 'visudo' at the first step.)
So I log in as a root at first.
Initial Setup (log in as a root)
Minimum install
Update the current packages
# apt update
# apt upgrade
Install "Guest Additions" in case of VirtualBox
Insert the image of "Guest Additions"
Mount the image
# mount /media/cdrom0Install the build dependencies
# apt install linux-headers-amd64 make perl gcc bzip2Build and install Guest Additions
# sh /media/cdrom0/VBoxLinuxAdditions.runUnmount the disk image and reboot
# eject
# reboot
Change the hostname if necessary
# sed -i 's/<CURRENT_HOSTNAME>/<NEW_HOSTNAME>/g' /etc/hosts
# echo '<NEW_HOSTNAME>' > /etc/hostname
# reboot
Enable the user to use 'sudo' command without password
Install sudo command
# apt install sudoSetup sudo
# echo '<USERNAME>' 'ALL=(ALL:ALL)' 'NOPASSWD: ALL' > /etc/sudoers.d/<USERNAME>
# chomd 0440 /etc/sudoers.d/<USERNAME>
Make sure the user can use sudo command without password
# su - <USERNAME>
$ sudo env
logout
Setting up GUI (log in as a general user)
Install gnome
$ sudo apt install task-gnome-desktop
$ sudo reboot
(In case of Ubuntu 20.04, install 'ubuntu-genome-desktop' instead of 'task-gnome-desktop'.)
Setup Japanese input
Install mozc
$ sudo apt install fcitx5-mozc
(In case of Ubuntu 20.04, install 'fcitx-mozc' instead of 'fcitx5-mozc'.)
Change "Alternate Characters Key" if necessary
Settings -> Keyboard Shortcuts -> "Alternate Characters Key"
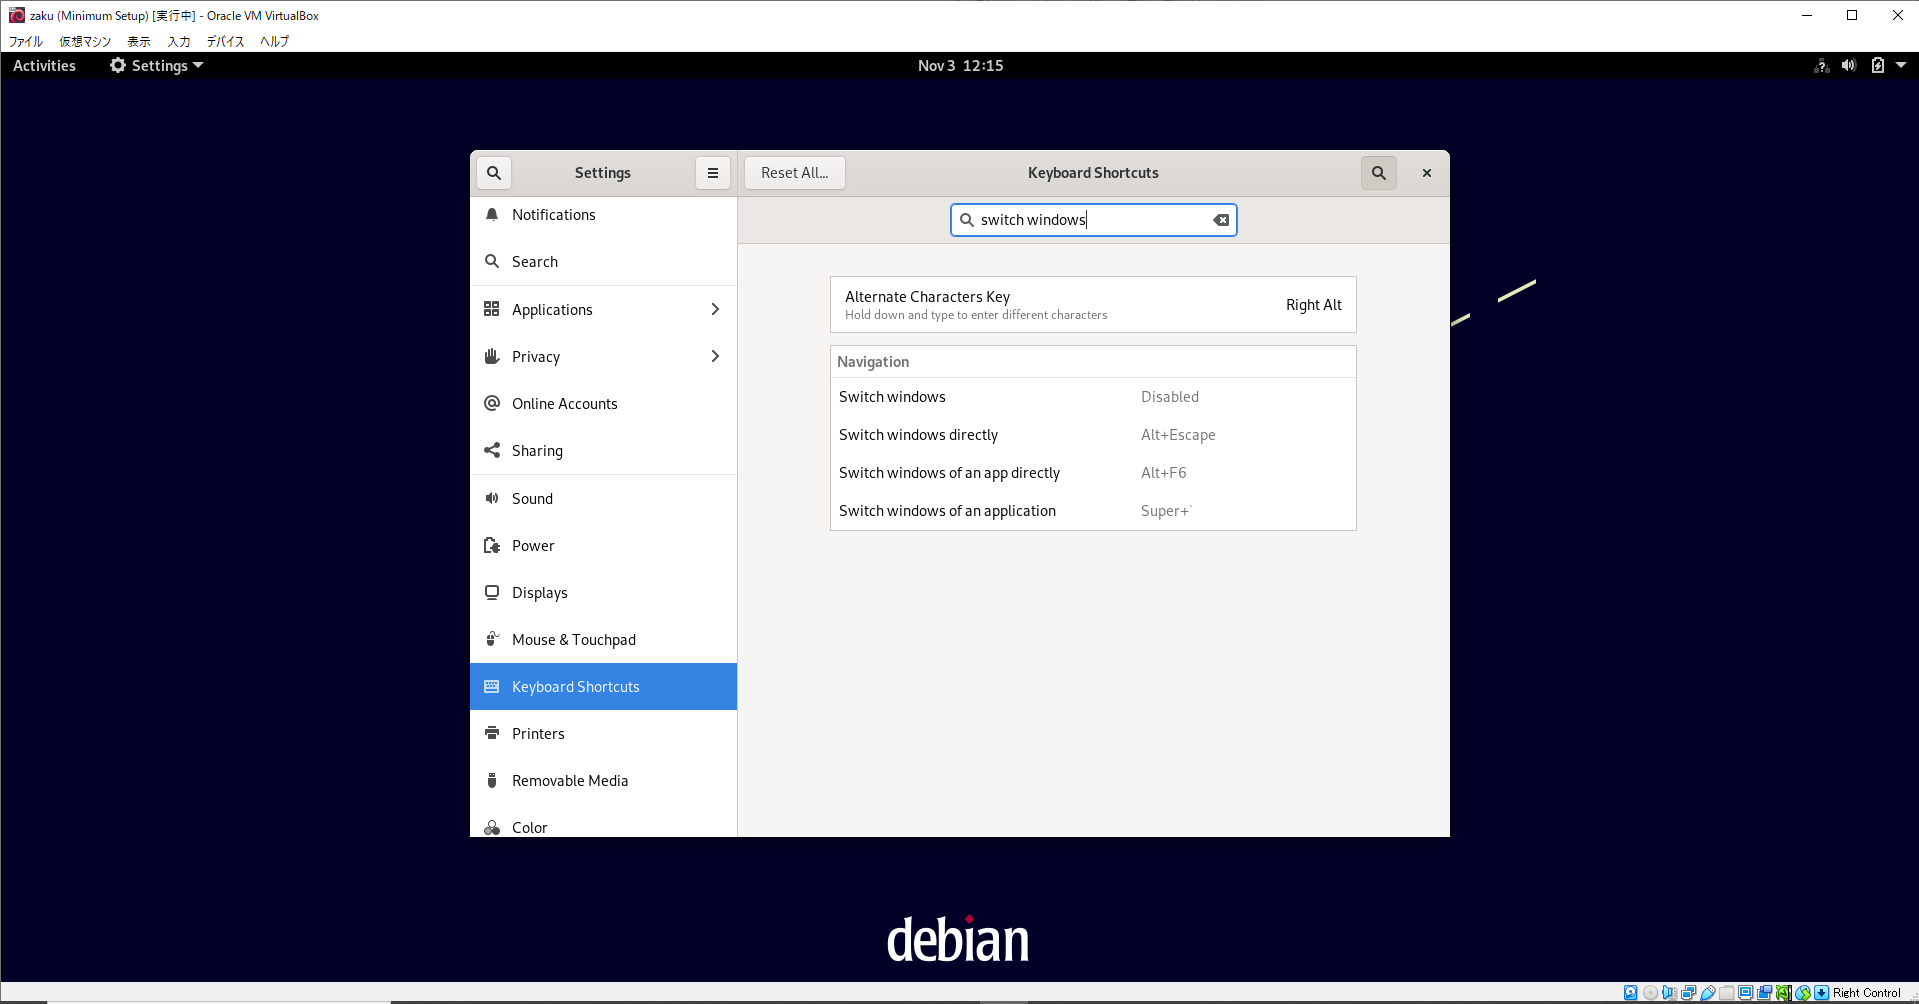
Disable the shortcut to "Switch windows of an application" (It is not compatible with changing input method key.)
Settings -> Keyboard Shortcuts -> "Switch windows of an application"
It is a good idea to search in "Keybord Shortcuts" view.
Setup fcitx5
Start fcitx5
Select "mozc" from "Available Input Method:" and append to "Current Input Method" in "Input Method" tab
Delete all from "Trigger Input Method" and add "Alt + `" to it in "Global Options" tab
- Select fcitx5 as input methodOpen "Input Method" and select "fcitx5"